Add OpenID to BlogEngine.NET 1.4 Part 1
Posted in ASP.NET, BlogEngine.NET, C# by Jarrett on 7/5/2008 8:26:00 PM - CSTUpdate : there is no Part 2 as I switched to AtomSite for my blog engine.
Here is a guide on how to add OpenID support to BlogEngine.NET 1.4. This first blog post will detail how to use an OpenID account to login as an existing blog user via impersonation. I've used Andrew's blog post How to add OpenID support to BlogEngine.NET as a starting place.
Pros
- Quick, minimum changes required
- Retains support of blogging tools (such as Live Writer)
- Easy to understand and backwards compatible
Cons
- Not "true" OpenID integration
- Accounts are maintained separately
- Impersonation file is required
Step 1: Download latest release of dotnetopenid library
Step 2: Place DotNetOpenId.dll into Bin folder (if compiling BlogEngine.Web then add reference to project)
Step 3: Update Login.aspx page
- Add
<%@ Register Assembly="DotNetOpenId" Namespace="DotNetOpenId.RelyingParty" TagPrefix="RP" %>
- Replace
<asp:Login ID="Login1" runat="server" class="loginbox" />
with
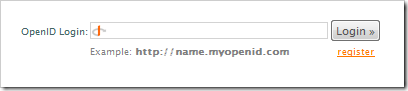
<RP:OpenIdLogin ID="OpenIdLogin1" runat="server" onloggedin="OpenIdLogin1_LoggedIn" />
Step 4: Update Login.aspx.cs code behind file
- Replace
protected void Page_Load(object sender, EventArgs e)
{
  if (Page.User.Identity.IsAuthenticated)
  {
    changepassword1.Visible = true;
    changepassword1.ContinueButtonClick += new EventHandler(changepassword1_ContinueButtonClick);
    lsLogout.Visible = true;
    Login1.Visible = false;
    Page.Title += Resources.labels.changePassword;
  }
  else
  {
    Login1.LoggedIn += new EventHandler(Login1_LoggedIn);
    Login1.FindControl("username").Focus();
  }
}
with
protected void Page_Load(object sender, EventArgs e)
{
  if (Page.User.Identity.IsAuthenticated)
  {
    changepassword1.Visible = true;
    changepassword1.ContinueButtonClick += new EventHandler(changepassword1_ContinueButtonClick);
    lsLogout.Visible = true;
    OpenIdLogin1.Visible = false;
    Page.Title += Resources.labels.changePassword;
  }
}
- Replace
void Login1_LoggedIn(object sender, EventArgs e)
{
  if (!Roles.IsUserInRole(Login1.UserName, BlogEngine.Core.BlogSettings.Instance.AdministratorRole))
    Response.Redirect(BlogEngine.Core.Utils.RelativeWebRoot, true);
}
with
protected void OpenIdLogin1_LoggedIn(object sender, DotNetOpenId.RelyingParty.OpenIdEventArgs e)
{
  //don't allow login control to login, we will do that manually
  e.Cancel = true;
  //get impersonated user
  string user = Impersonation.Impersonate(e.ClaimedIdentifier);
  if (!Roles.IsUserInRole(user, BlogEngine.Core.BlogSettings.Instance.AdministratorRole))
    Response.Redirect(BlogEngine.Core.Utils.RelativeWebRoot, true);
  else
    FormsAuthentication.RedirectFromLoginPage(user, OpenIdLogin1.RememberMe);
}
Step 5: Add Impersonation.xml file to App_Data folder
<impersonation>
  <impersonate>
    <id>http://jarrettv.myopenid.com/</id>
    <user>Jarrett</user>
  </impersonate>
</impersonation>
Step 6: Add Impersonation.cs to BlogEngineCore project and compile
using System;
using System.Linq;
using System.Xml.Linq;
using System.Web;
using System.Web.Hosting;

namespace BlogEngine.Core
{
    public class Impersonation
    {
        public static string Impersonate(string id)
        {
            string user = id;
            string path = BlogSettings.Instance.StorageLocation + "impersonation.xml";

            if (!VirtualPathUtility.IsAppRelative(path))
                throw new ArgumentException("xmlFileName must be app-relative");

            string fullyQualifiedPath = VirtualPathUtility.Combine
                (VirtualPathUtility.AppendTrailingSlash
                (HttpRuntime.AppDomainAppVirtualPath), path);

            string actualPath = HostingEnvironment.MapPath(fullyQualifiedPath);

            XDocument xDoc = XDocument.Load(actualPath);
            user = xDoc.Element("impersonation").Elements("impersonate")
                .Where(x => x.Element("id").Value == id).Select(x => x.Element("user")).Single().Value;
            return user;
        }
    }
}
Step 7: Deploy following changed files
- Login.aspx
- Login.aspx.cs
- \Bin\BlogEngine.Core.dll
- \Bin\DotNetOpenId.dll
- \App_Data\Impersonation.xml
In the next part, I will add OpenID support to the comment system.
Comments
Posted by Andrew on 9/11/2008 7:25:59 PM - CST
Posted by Jarrett on 9/11/2008 7:25:59 PM - CST
Posted by max on 3/8/2009 5:40:38 AM - CST
Posted by Jarrett on 3/16/2009 9:08:27 AM - CST