Jarrett's Tech Blog
-
Simple Fix for ASP.NET FormsAuthentication Redirect when using AJAX
There is one paticular annoying "feature" of ASP.NET forms authentication module that has kicked my butt many times. When a user loads a page but their session has expired, the module will take over the request and return a 302 redirect to the login page rather than the appropriate 401 unauthorized.
Specification of the correct behaviour has been part of the HTTP standard for more than 15 years now. HTTP 1.1, RFC 2616 (and before that, HTTP 1.0, RFC 1945) specify the correct behavior in sections 10.4.2 and 9.4 respectively (the verbiage hasn't changed significantly):
This "feature" has always been broken in ASP.NET and it has caused me countless hours of research and workarounds. Others have also dealt with the problem:
- Prevent Forms Authentication Login Page Redirect When You Don't Want It
- Basic Authentication with WCF Web API hosted in IIS / Getting a 404 - Disable Forms Authentication Redirection
- Prevent forms auth from redirecting to login page in RESTFul WCF
- AJAX and FormsAuthentication, how prevent FormsAuthentication overrides HTTP 401?
- How to Handle Forms Authentication Timeout During an AJAX Request
- How to intercept 401 from Forms Authentication in ASP.NET MVC?
Back in 2008, I used the HttpModule workaround as decribed in many of the above posts. I've also utilized an Application_OnError workaround. Unfortunately, many of these solutions require too much code, additional config, and/or tradeoffs.
I would prefer a fix directly to forms authentication, but Microsoft still hasn't addressed the problem. We could replace forms authentication with something like AppHarbor.Web.Security or MADAM. However, this can be scary to those who are unfamiliar with exercising options outside of those provided by Microsoft.
So that brings me to point of this post. How can we KISS and still fix the damn problem?
Add this to Global.asax.cs to fix the broken FromsAuthentication redirect behavior. This code will reset the 302 back to 401 for AJAX requests.
Add this javascript to your layout so that anytime you use jQuery ajax, get, or post, the client will detect the 401 and reload the page. This will cause the browser to redirect to login page.
That's all. Problem fixed with very few lines of code.
-
ASP.NET MVC Bundling of Bootstrap Less Source
Our team is utilizing bootstrap for our MVC application. We would like to be able to update the variables.less file and have the entire "theme" of the website updated.
The typical methods are:
- Utilize a tool (Chirpy in Visual Studio) to automatically output css anytime the less file is updated
- Transform the less on the server side
I prefer the second approach since:
- It doesn't depend on everyone having the same tool setup
- You don't have worry about versioning of the code generated files
The most popular library dotless utilizes HttpHandlers to translate the less to css on the server side. This requires extra configuration in the web.config.
However, the latest version of ASP.NET MVC, version 4, has support for bundling and minification. It also supports transforms.
The asp.net article shows a few simple lines of code to add a transform for less files.
Unfortunately, this method only supports simple less files. If there are any imports, like in bootstrap, the application will throw a FileNotFoundException.
{"You are importing a file ending in .less that cannot be found.":"reset.less"}
We need to be able to tell the parse method where to find the imported files. You can do that by providing a VirtualFileReader that looks in your less folder.
Now all you need to do is provide the config with the VirtualFileReader to the parse method like so:
Perfect! With just a single reference to bootstrap.less you can have your less files utilize the existing bundling and minification strategy.
-
My Son Henry is Maximus Cuteness
I'm giving my old blog a rebirth and what better way than to show off my new son.
Henry Vance Born May 2011
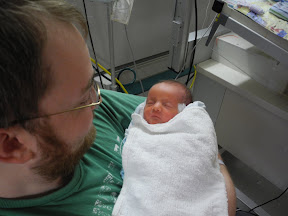
This little fella was the best birthday present ever. He just couldn't wait to meet us as he was born a month early. Mom did a terrific job with the pregnancy and birth.
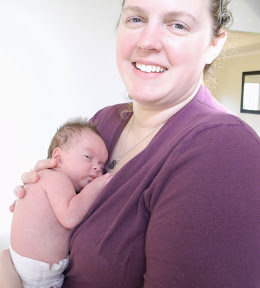
We are now 6 months in and I had no idea how cute someone could be. Henry just seems to shine cuteness.
He already sitting up and it looks like he is preparing to crawl around. I've already caught him sneaking a drink from the Christmas party keg (j/k).
Mommy already has him liking beans and I (Daddy) had him banging on the keyboard this morning. He is on his way to being the greatest Vance ever.
-
404 Not Found but not 410 Gone
Update: I've restored a couple posts
Update2: All blog pages are back (sorry for any lost comments)
During a recent server transition, I lost some pages to my blog site (404). However, I am recovering so they shouldn't be gone forever (410).
These http status codes are an important part of how the web works.
Please check back soon.
PS: it may be later since I now have an awesomely cute son
-
Woodworking Maple Veneered Fireplace Mantel Project
Our latest woodworking project is a maple veneered fireplace mantel. We custom made it to replace the previous mantel which was too high and dark.
Before
After
Project By
- Jarrett Vance
- Kristin Vance *Henry
- Mike Vance
- Anikin Vance
Build tasks
- Remove old mantle, replace with 2-bolt anchors (1/2" threaded rods)
- Add data jack above bolt with for cable (RJ45), ethernet (cat5e), hdmi
Add 4 electrical plugs above other bolt
- Measure and build box, drill holes for bolts, cut slots for wrench
- Fill with wood patch, sand, and clean surface for glue (contact cement)
- Glue veneer to box using contact cement
- Trim and finish veneer (veneer found at local WoodCraft)
- Level and bolt on mantle above fireplace
We built this beautiful mantel at Vance & Sons Cabinets in Fairhope, AL.
I hope you like our new fireplace mantel. We love it!
-
MVC3 Talk
Tonight, I will be talking about MVC3 to bugdotnet which is Birmingham's .NET User Group.
Topic: ASP.NET MVC 3
ASP.NET MVC 3 is a framework for building scalable, standards-based web applications using well-established design patterns and the power of ASP.NET and the .NET Framework. The latest version includes great new features: razor view engine, expanded validation, and built in support for dependency injection.
As part of my preparation for the talk, I built a feedback site using many of the new features in MVC3. The feedback site is live and is is currently hosted on my backup server at discountasp. I've posted the source code on github.
The reason for this feedback site was two-fold. I not only wanted to use newer MVC3 features, but I wanted to solicit feedback for my talk. You see, I have already given the MVC3 talk to GGMUG, which is the Gwinnett, Georgia, Microsoft User Group. The presentation was great. The audience was great. The feedback was great.
From this feedback, tonight I will approach the audience with a choice.
- Learn about what is new in MVC3 or
- Learn about MVC in general
Please attend if you'd like to have a say. The meeting is tonight at 6:30 pm at New Horizons located at:
601 Beacon Pkwy W
Birmingham, AL 35209-3121
-
Email Signature in Android Fixed
Update: all newer versions of Android now have this fixed. Move along, nothing to see here.
Exchange Email Client Missing Signature
I know many people (including myself) that use the email client in Android for personal and business use. Yes, it is lame that there is no signature support. It is a popular issue on the Android issue tracker. I hear all sorts of work arounds, such as copy and paste the signature from a text file. Well, instead of using the workaround, I decided to fix the issue.
The Fix & Source
I've mentioned before that the best thing about Android is that it is open and anyone can view the source. For example, here is the source to the Android email app. Because it is a built-in application, you must download the entire Android source code in order to make changes to the Email app. Once I downloaded the source, I made the following changes:
- Update storage mechanism to store a signature with each account
- Update account settings to add signature preference
- Update new email compose to automatically insert the signature
- New Support for reply, and forward
You can view the source code of these changes on my GitHub.
Download Email.apk for Android 2.1 (Nexus One, Droid, Root Only)
Unfortunately, because this is a built-in application, you can't update this application from the market (this will likely be fixed in next Android release). You can only update this application if you have root access to your phone. If you do have root access, download the Email.apk and push it your phone. Because the Email app is always running in the backround, you should do this from recovery, otherwise you'll need to re-enter all your accounts.
adb shell
mount /system -o remount,rw
adb push download/Email.apk /system/app/Email.apk
Or, you can download directly to your phone using the barcode below. You'll need to copy it into the /system/app folder with a program like Root Explorer.
-
Android Market Needs Gift Cards
Update: Amazon has an app store for Android that you can use gift cards with. Google is still missing out on this opportunity!
As of today, the only valid purchasing method on the Android Market is the use of a credit card. Android needs gift cards to expand access to the Android Market. If there were gift cards, people could gift apps and more people (especially the young) could buy apps. I am more likely to buy an app with a gift card than my own credit card. iTunes gift cards are everywhere (literally in almost every store) which increases exposure to Apple's brand. Google needs this too!
Expand Access with Gift Cards
If there were Android gift cards, it would expand access to the market for young people or people that do not have a credit card. Lets face it, kids buy games and there are not many parents that let their kid link their credit card to their phone. If there were gift cards, parents could buy their kids a gift card or kids could buy a gift card with their own money.
Also, some people, for whatever reason, may not have a credit card or want to use a credit card on the internet. These people need an alternative method to buy apps on the market since cash is out of the question.
Gift Card Culture
The gift card business has boomed due to what I believe is a gift card culture. I don't know about you, but what do you give to the dad that has everything? That is easy, get them a gift card to Bass Pro Shops, right? I'll admit, I give gift cards to people because it is easier than trying to pick something out for them.
Receiving a gift card is never as personal as getting a physical gift, but sometimes it is preferable. For example, I love technology. Technology is easy for me to buy because I understand it. However, it is too complex for my grandmother to gift an SSD to me. So I love it when I get a Newegg, Best Buy, or Amazon gift cards. Also, I am more likely to make a larger purchase when using a gift card.
Free Android Brand Advertising
iTunes gift cards are everywhere. I've seem them at every major retailer, wholesale clubs, grocery stores, drug stores, and gas stations. Because they are so easy to find and buy they make a perfect last minute gift. Good advertising is in-your-face-advertising and Apple has succeeded here.
Google should introduce gift cards to the Android Market as soon as possible. Let's expand the market!
More Links
-
Intel SSD Deal and Price Watch
I'm in the market for an SSD but the prices are still sky high. I'd like to do a fresh install on my desktop machine and install Windows 7. My current Vista install is running out space due to the WinSxs folder. A new SSD would be a perfect reason for a reinstall and a nice speed boost.
I've been running an SSD in my laptop for about 5 months and I love it. The speed and battery life is incredible.
Back in August 2009, I was lucky to snag an Intel X25-M G2 from Newegg for $229.
The price immediately sky rocketed right after my purchase it and it hasn't settled back down since.
I just installed this cool new extension for Chrome called The Camelizer. It watches the price of products at various web sites and shows a graph. I'll definitely use this tool to find the right time to buy.
Update: I was watching the OCZ Agility drive with Camelizer and it notified me of a recent price drop. I was extremely tempted as it also came with a mail-in rebate the lowered the price to $129. This is a great deal for a 60GB SSD. However, I just didn't feel the time was right as I haven't found a cheap copy of Win7 yet. Anyway, within a few hours it sold out!
-
Output Large Result Sets to Excel 2007 from SSIS 2005
I was recently in a situation where I needed to output a large amount of data to an excel file. This file is generated periodically and used by business analysts. We are using SSIS 2005 and the BAs are using Office 2007. Since the report would be bigger than 65,536 row limit of 2003 format, we needed to use 2007 format.
You'll need to start your data flow with an OLE DB Source as according to this thread it is required for compatibility.
Next, in the Connection Managers, create a New OLE DB Connection. Choose Microsoft Office 12.0 Access Database Engine OLE DB Provider. For now, leave the details blank and click OK to continue.
Note: you'll need Office 2007 installed or the 2007 Office System Driver: Data Connectivity Components
You'll notice that it looks like you are using a database connection instead of the typical Excel Connection you used for Excel 2003.
Select your new connection and view the properties. Change the connection string to the value below.
Provider=Microsoft.ACE.OLEDB.12.0;Data Source=c:\myFolder\myExcel2007file.xlsx;Extended Properties="Excel 12.0 Xml;HDR=YES";
Don't forget to change the file path in the connection string.
Next, I recommend you truncate any large columns to 255 using a Derived Column transformation. Also, use a Data Conversion transformation to convert all strings to unicode strings.
Now, that your data is in the correct format, let's clean up the column names. I use a Union All transformation and delete the old columns and rename the derived and converted columns. These last couple steps make the data more compatible with Excel.
Finally, your ready to dump the data to an Excel 2007 file using an OLE DB Destination. Choose your new connection you made earlier. For the name of the table or view, choose New to create a new worksheet in the Excel 2007 workbook output. In the CREATE TABLE script, you can rename the worksheet if desired.
Because of the cleanup, you'll have a simple one to one mapping. Now you can output more than 65k rows into an Excel file from SSIS 2005.


