Jarrett's Tech Blog - Browsing C#
-
Simple Fix for ASP.NET FormsAuthentication Redirect when using AJAX
There is one paticular annoying "feature" of ASP.NET forms authentication module that has kicked my butt many times. When a user loads a page but their session has expired, the module will take over the request and return a 302 redirect to the login page rather than the appropriate 401 unauthorized.
Specification of the correct behaviour has been part of the HTTP standard for more than 15 years now. HTTP 1.1, RFC 2616 (and before that, HTTP 1.0, RFC 1945) specify the correct behavior in sections 10.4.2 and 9.4 respectively (the verbiage hasn't changed significantly):
This "feature" has always been broken in ASP.NET and it has caused me countless hours of research and workarounds. Others have also dealt with the problem:
- Prevent Forms Authentication Login Page Redirect When You Don't Want It
- Basic Authentication with WCF Web API hosted in IIS / Getting a 404 - Disable Forms Authentication Redirection
- Prevent forms auth from redirecting to login page in RESTFul WCF
- AJAX and FormsAuthentication, how prevent FormsAuthentication overrides HTTP 401?
- How to Handle Forms Authentication Timeout During an AJAX Request
- How to intercept 401 from Forms Authentication in ASP.NET MVC?
Back in 2008, I used the HttpModule workaround as decribed in many of the above posts. I've also utilized an Application_OnError workaround. Unfortunately, many of these solutions require too much code, additional config, and/or tradeoffs.
I would prefer a fix directly to forms authentication, but Microsoft still hasn't addressed the problem. We could replace forms authentication with something like AppHarbor.Web.Security or MADAM. However, this can be scary to those who are unfamiliar with exercising options outside of those provided by Microsoft.
So that brings me to point of this post. How can we KISS and still fix the damn problem?
Add this to Global.asax.cs to fix the broken FromsAuthentication redirect behavior. This code will reset the 302 back to 401 for AJAX requests.
Add this javascript to your layout so that anytime you use jQuery ajax, get, or post, the client will detect the 401 and reload the page. This will cause the browser to redirect to login page.
That's all. Problem fixed with very few lines of code.
-
ASP.NET MVC Bundling of Bootstrap Less Source
Our team is utilizing bootstrap for our MVC application. We would like to be able to update the variables.less file and have the entire "theme" of the website updated.
The typical methods are:
- Utilize a tool (Chirpy in Visual Studio) to automatically output css anytime the less file is updated
- Transform the less on the server side
I prefer the second approach since:
- It doesn't depend on everyone having the same tool setup
- You don't have worry about versioning of the code generated files
The most popular library dotless utilizes HttpHandlers to translate the less to css on the server side. This requires extra configuration in the web.config.
However, the latest version of ASP.NET MVC, version 4, has support for bundling and minification. It also supports transforms.
The asp.net article shows a few simple lines of code to add a transform for less files.
Unfortunately, this method only supports simple less files. If there are any imports, like in bootstrap, the application will throw a FileNotFoundException.
{"You are importing a file ending in .less that cannot be found.":"reset.less"}
We need to be able to tell the parse method where to find the imported files. You can do that by providing a VirtualFileReader that looks in your less folder.
Now all you need to do is provide the config with the VirtualFileReader to the parse method like so:
Perfect! With just a single reference to bootstrap.less you can have your less files utilize the existing bundling and minification strategy.
-
Unzip Nested Zip Files While Streaming
I recently encountered a scenario where I needed to unzip all the files in a zip file and also any files from internal zip files. The source data is streaming in through an HTTP POST via IIS into BizTalk. The zip files can be large (up to 200 MB) and there can be multiple posts happening at the same time. This is too much data to fit in memory. Also, I needed to avoid unnecessary network traffic so using temporary files is not an optimal solution. Therefore, I needed a forward-only streaming solution.
To accomplish this, I turned to #ziplib. The ZipInputStream object looked like the perfect solution to this situation. Here is an example of how to use this class:
using ( ZipInputStream s = new ZipInputStream(stream)) {
  ZipEntry theEntry;
  while ((theEntry = s.GetNextEntry()) != null) {
    int size = 2048;
    byte[] data = new byte[2048];
    size = s.Read(data, 0, data.Length);
    if (size > 0) {
      Console.Write(new ASCIIEncoding().GetString(data, 0, size));
    } else {
      break;
    }
  }
}
As the raw data is streamed through the ZipInputStream, it gets unzipped. The GetNextEntry() method sets the position to the beginning of the next file. Then we just read from the ZipInputStream to get the unzipped file data. So to unzip nested zip files, I came up with a function I could call recursively:
public static void NestedUnzip(Stream stream, string targetPath)
{
  ZipInputStream s = new ZipInputStream(stream);
  ZipEntry entry;
  while ((entry = s.GetNextEntry()) != null) {
    //when internal zip file, unzip it
    if (Path.GetExtension(entry.Name).ToLower() == ".zip") {
      NestedUnzip(s,
        Path.Combine(targetPath, Path.GetFileNameWithoutExtension(entry.Name)));
    } else {
      //make sure target path exists
      string path = Path.Combine(targetPath, entry.Name);
      Directory.CreateDirectory(Path.GetDirectoryName(path));

      //write the data to disk
      using (FileStream fs = File.Create(path)) {
        byte[] buffer = new byte[1024];
        int read = buffer.Length;
        while (true) {
          read = s.Read(buffer, 0, buffer.Length);
          if (read > 0) fs.Write(buffer, 0, read);
          else break;
        }
      }
    }
  }
}
Now this would work great for my needs as it process the data as a forward-only read-only stream. However, whenever a nested zip runs out of entries (i.e. GetNextEntry() == null) the ZipInputStream calls close on the underlying stream. This results in the unzip process ending prematurely.
To fix this, I commented out the Close() call within the GetNextEntry() method of the ZipInputStream class:
if (header == ZipConstants.CentralHeaderSignature ||
  header == ZipConstants.EndOfCentralDirectorySignature ||
  header == ZipConstants.CentralHeaderDigitalSignature ||
  header == ZipConstants.ArchiveExtraDataSignature ||
  header == ZipConstants.Zip64CentralFileHeaderSignature) {
  // No more individual entries exist
  // -jv- 11-Jun-2009 Removed close so it can support nested zips
  //Close();
  return null;
}
Of course, the calling method should properly close the source stream so this is a safe change to make. For example:
using (Stream s = inmsg.BodyPart.GetOriginalDataStream()) {
  NestedUnzip(s, unzipLocation)
}
The result is a perfect streaming solution with low memory usage and no need for temporary files.
-
LINQ Syntax Choice
Which LINQ syntax do you prefer? The fluent style or the query style?
I personally prefer the Fluent style as it appears to come natural to me. However, I have yet to deal with some of the more complicated joins that may work better with the query style syntax.
-
Using the New DateTime Support in .NET 3.5 via MVC & jQuery
I've added New Global Date and Time Support to BlogSvc by utilizing the new expanded support for date times with proper time zone support. Some highlights in the MSDN documentation:
The DateTimeOffset structure represents a date and time value, together with an offset that indicates how much that value differs from UTC. Thus, the value always unambiguously identifies a single point in time. A DateTimeOffset value is not tied to a particular time zone, but can originate from any of a variety of time zones. The TimeZoneInfo class makes it possible to work with dates and times so that any date and time value unambiguously identifies a single point in time. Taking advantage of time zone support in the .NET Framework is possible only if the time zone to which a date and time value belongs is known when that date and time object is instantiated.
So the MSDN documentation is not clear on which class can make a date/time unambiguous. However, the last sentence is the best clue. We must capture both the UTC value and an originating time zone.
For an ASP.NET MVC application we can add configuration to associate all date/times to our preferred time zone.
With this configuration, we can now write an HtmlHelper extension to display a DateTimeOffset in our preferred time zone.
Call the extension method and pass it either a DateTimeOffset or a DateTime
.
This will result in the follwing html:
<abbr title='Tuesday, October 07, 2008 10:01 PM (GMT-06:00) Central Time (US & Canada)'>10/7/2008 10:01 PM - CST</abbr>
This gives an abbreviated date/time display at your preferred time zone.
However, you may want to display time relative to the user browsing your website. There are two ways to accomplish this:
- Ask and store each user's time zone
- Automatically determine user's time zone using javascript
The first option is commonly used with forums and requires the user to register and choose their preferred time zone. The second option makes much more sense for content websites (such as a blog) since it can occur automatically without registration.
There is already a great plugin for jQuery that can display fuzzy times that are directly relative to the user. It is called the Time Ago Plugin. To use it, lets create another helper extension that utilizes a micro-format:
This creates abbreviations in the html, that when activated through jQuery show times that will be automatically updated even after the user has loaded the page.
This DateTime display is much more recognizable and personable to the casual user.
Head on over to the BlogSvc website to download the code.
Update: here is a bonus function that will allow you to format the date (with access to the time zone information) anyway you'd like.
Call it like
:
-
New jQuery Rater Plugin for Star Ratings
The jQuery Star Rating widget is a neat control to add to your website. It has many options that allow you to easily customize it. However, it's usage is based on a fully degradable form submission model which means you must use markup containing an option list. Unfortunately, this means it becomes quite complex to support a rating model that fires off an ajax request to submit a new rating. Therefore, the developer is left to worry about:
- Writing code on the server to generate the option list only for users that have not already rated
- If the user has already rated, the server must generate different markup, or set the widget to disabled
- The developer must write javascript to handle the widget callback and build an ajax request
- No built in support for rating count and updated rating result
- No built in support for a failed rating
To make life easier, I wrote the jQuery Rater Plugin that should reduce the complexity of implementing an ajax rating scenario.
jQuery Rater Plugin DemoFeatures
- Auto Ajax posting
- Supports rating update and rating count
- Shows previous rating before user has rated
- Markup is same for rated and unrated
- Supports step ratings (partial stars)
View the Demo Page
First, lets take a look at the markup which is contained in an ASP.NET user control. However, you could write this in your server language of choice. There are three things being set below. The width of the stars, the current rating, and the count of ratings.
The only markup elements required by the plugin are the "ui-rater-starsOff" and "ui-rater-starsOn" spans. Also, they must be contained within an element that has an id you can reference.
We only need to activate the plugin when the user has not already rated the entry.
The only option I've set is the address to post the rating to. When the user performs a rating, the plugin will automatically build an ajax request to the postHref. It includes the id and chosen rating value in the form post data.
This plugin does more with less code than the existing jQuery Star Rating Widget because it foregoes the degrade-ability in favor of ajax.
- Previous Javascript size: ui.core.packed.js 4KB + ui.stars.pack.js 4KB + rate.js 2KB = 10KB
- New Javascript size: jquery.rater.js 3KB (unpacked)
To see a full server implementation, see the source code of AtomSite.
Download jQuery Rater Plugin (javascript + demo html + image + sample server page)
Found this plugin useful? Please kick it -
-
New BlogSvc Release 0.2
This release includes an implementation of Atom Publishing Protocol on WCF 3.5. In the words of Tim Bray:
An Atompub implementation lets you create, retrieve, update, and delete (CRUD) Web Resources. ... Atompub starts with a Service Document, which contains one or more named Workspaces, which contain Collections, which are what you actually POST to in order to start up the CRUD process. So the idea is simple; have a collection that when you POST to it, creates a new publication.
The object model is based off of the Atom Syndication Format and the AtomPub specs. All of the objects are based off of Xml or the new XElement. Propeties are used to support strongly typed access to the data.
Atom Syndication Format Atom Publishing Protocol AtomCategory AppCategories AtomContent AppCollection AtomEntry* AppControl AtomFeed AppService AtomGenerator AppWorkspace AtomLink* AtomPerson Atom Threading Extension AtomSource ThreadInReplyTo AtomText * Extended This release should work in IIS6 or IIS7 with .NET 3.5. Also the SVC handler must support all verbs. Since AtomPub is RESTful, you'll need PUT and DELETE to go along with the usual GET and POST verbs.
The WCF service is built using the new Web Programming Model available in 3.5. However, it is designed to support normal web services as well (more on this in a future post). A neat WCF feature with this release is the support of media entries allowing a user to post images to a collection. I found the trick to supporting raw data on Carlos' blog. However, there is a catch. Anytime you want to accept unknown content types and known content types, you must only deal with Stream objects. For example, although CreateEntry will always return an AtomEntry document you must specify a Stream because the input could be an AtomEntry or say a JPG image.
[ServiceContract]
public interface IAtomPub
{
    [WebGet(BodyStyle = WebMessageBodyStyle.Bare, UriTemplate = "{workspaceName}/{collectionName}/{entryName}/media")]
    Stream RetrieveMedia(string workspaceName, string collectionName, string entryName);

    [WebInvoke(BodyStyle = WebMessageBodyStyle.Bare, UriTemplate = "{workspaceName}/{collectionName}")]
    Stream CreateEntry(string workspaceName, string collectionName, Stream stream);

    [WebGet(UriTemplate = "{workspaceName}/{collectionName}/{entryName}")]
    Stream RetrieveEntry(string workspaceName, string collectionName, string entryName);

    [WebInvoke(BodyStyle = WebMessageBodyStyle.Bare, UriTemplate = "{workspaceName}/{collectionName}/{entryName}", Method = "PUT")]
    Stream UpdateEntry(string workspaceName, string collectionName, string entryName, Stream stream);

    [WebInvoke(UriTemplate = "{workspaceName}/{collectionName}/{entryName}", Method = "DELETE")]
    void DeleteEntry(string workspaceName, string collectionName, string entryName);

    [OperationContract]
    [WebGet(UriTemplate = "service")]
    AppService RetrieveService();

    [WebGet(UriTemplate = "{workspaceName}/{collectionName}/category?scheme={scheme}")]
    AppCategories RetrieveCategories(string workspaceName, string collectionName, string scheme);

    [WebGet(UriTemplate = "{workspaceName}/{collectionName}")]
    AtomFeed RetrieveFeed(string workspaceName, string collectionName);
}
You can direct it to a strongly typed implementation by checking the content type.
public Stream CreateEntry(string workspaceName, string collectionName, Stream stream)
{
    string contentType = WebOperationContext.Current.IncomingRequest.ContentType;
    AtomEntry entry;
    if (contentType == Atom.ContentType || contentType == Atom.ContentTypeEntry)
    {
        entry = new AtomEntry();
        XmlReader reader = new XmlTextReader(stream);
        entry.Xml = XElement.Load(reader);
        entry = CreateEntry(workspaceName, collectionName, entry);
    }
    else entry = CreateMedia(workspaceName, collectionName, stream);
    return GetStream(entry);
}
IDs and Hrefs
- Blog.svc WCF Service
- UriTemplates
- Handling Entry or Media Resources
- WebLinks
- Object Model over .Net 3.5 SP1 Object Model
Test AtomPub and Atom and Threading auto links.
-
WCF Adds Root Node on IXmlSerializable Object
Has anybody else had trouble with WCF adding a root node on their objects that implement IXmlSerializable?
Here is the setup:
- Create a class that implements IXmlSerializable
public class Entry : IXmlSerializable { public XElement Xml { get; set; } public void ReadXml(XmlReader reader) { Xml = XElement.Load(reader, LoadOptions.SetBaseUri); } public void WriteXml(XmlWriter writer) { Xml.WriteTo(writer); } }- Create a WCF service that returns the object.
[ServiceContract]
[XmlSerializerFormat]
public interface IService
{
  [OperationContract]
  [WebGet(BodyStyle = WebMessageBodyStyle.Bare, UriTemplate = "{a}/{b}/{c}")]
  Entry RetrieveEntry(string a, string b, string c);
}

public class Service: IService
{
  public Entry RetrieveEntry(string a, string b, string c)
  {
    return new Entry
    {
      Xml = new XElement("test", a + "/" + b + "/" + c);
    }
  }
}
When hitting the service located at http://localhost/EntryService.svc/one/two/three, I expect to get the following xml:<test>one/two/three</test>
Instead, I always get the above xml wrapped in a root node as shown below:<Entry xmlns="http://schemas.datacontract.org/2004/07/EntryTest"> <test>one/two/three</test> </Entry>
- I've set the BodyStyle to Bare
- I've set the [XmlSerializerFormat] attribute
- I've tried putting [XmlRoot(null)] on the Entry class
Update (7/27): It appears you must use the XmlRootAttribute to accomplish this. Your WriteXml(XmlWriter writer) method can check to see if the root node was already added by the serializer, and if not add it:
public void WriteXml(XmlWriter writer)
{

    //only start document if needed
    bool start = false;
    if (writer.WriteState == WriteState.Start)
    {
        start = true;
        writer.WriteStartDocument();
        writer.WriteStartElement("root", "http://example.com");
    }
    //TODO: custom serialization here

    if (start)
    {
        writer.WriteEndElement();
        writer.WriteEndDocument();
    }
}
This allows the WriteXml to be usable even when the object isn't being serialized by the WCF serializer.
-
BlogSvc - New Blogging Service for .NET 3.5
Update: BlogService now has it’s own website, see http://blogsvc.net
I've started a new project on CodePlex called BlogService. Eventually, it will have it's own website at blogsvc.net. The point of this project is to provide a robust back-end for a blog site. It uses the provider model design pattern for abstracting the data layer similar to ASP.NET providers. I've uploaded a design diagram of the major classes. It also contains a WCF service that will expose multiple endpoints (soap, rest, json).
To kick things off, I created a community preview release that includes the following functionality:
- BlogProvider
- XmlBlogProvider
- Business (Blog, BlogSite, BlogComment, etc.)
- Configuration
- Unit Tests
- WCF Service
- Multi-site support
This release provides most of the functionality needed to support a front-end blogging site. It does not include web pages yet.
-
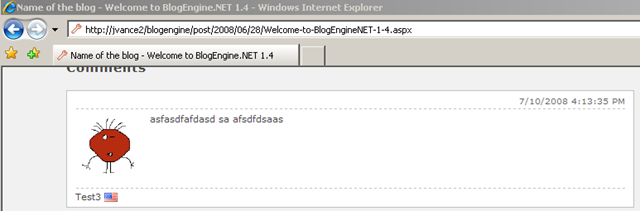
Comments Security Hole in BlogEngine.NET 1.4
I found a hole in BlogEngine.NET that allows anyone to delete and approve comments.
UPDATE 7/11: Fixed in 1.4.0.12Verify the Hole
- Add a test comment to your blog
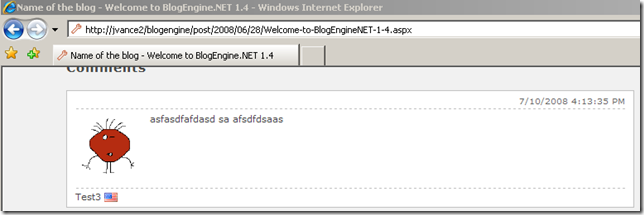
- Refresh the blog posting to retrieve latest source
- View source of blog posting
- Find guid of comment to delete (see line 103 below)
<div id="id_9c2b8578-1dde-421e-94ff-5ea7e0d82012" class="comment"> <p class="date">7/10/2008 4:13:35 PM</p> <p class="gravatar"><img src="http://www.gravatar.com/avatar/b642b4217b34b1e8d3bd915fc65c4452.jpg?s=80&d=..." alt="Test3" /></p> <p class="content">asfasdfafdasd sa afsdfdsaas </p> <p class="author"> Test3 <img src="/blogengine/pics/flags/us.png" class="flag" alt="us" /> </p> </div>- Request a POST to BlogPostUrl.aspx?deletecomment=guid
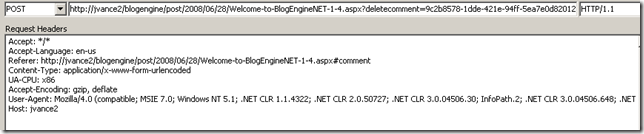
- Refresh the page and notice comment is deleted
Patch the Hole
You can patch the hole by updating the Page_Load event in the CommentView.ascx.cs file by checking for an authenticated user (lines 117,118, & 127)
protected void Page_Load(object sender, EventArgs e)
{
  if (Post == null)
    Response.Redirect(Utils.RelativeWebRoot);

  if (!Page.IsPostBack && !Page.IsCallback)
  {
    if (Page.User.Identity.IsAuthenticated)
    {
      if (Request.QueryString["deletecomment"] != null)
        DeleteComment();

      if (!string.IsNullOrEmpty(Request.QueryString["approvecomment"]))
        ApproveComment();

      if (!string.IsNullOrEmpty(Request.QueryString["approveallcomments"]))
        ApproveAllComments();
    }

  string path = Utils.RelativeWebRoot + "themes/" + BlogSettings.Instance.Theme + "/CommentView.ascx";
Repeat the steps given above to verify that the hole has been patched.
In the process of adding OpenID support to the comment system in BlogEngine.NET I found myself deep in a rabbit hole of refactoring. This comment security issue is just one of the things I've found during my journey. I've reported the issue on the BlogEngine.NET Issue Tracker. I think it is important to point out that the patch above is just a quick fix. The proper solution is to put authorization checks in the business layer (the BlogEngine.Core.Post business object in this case).