Publish Photos with Live Photo Gallery to Picasa Online
Posted by JarrettV on 8/19/2009 11:35:08 AM - CSTThe following guide will assist you in posting your favorite photos online for you friends and family to enjoy. It will also show you how to geotag those photos as to see where the photo was taken on the map.
Step 1: Import Photos from Camera
You should already have Windows Live Photo Gallery installed on your machine. If not, you can download it from Microsoft.
Tip: when downloading, uncheck the MSN Toolbar and anything else you don't need from the install.
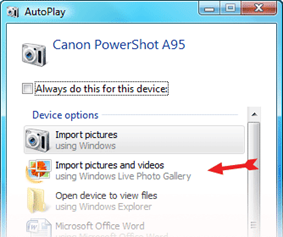
Once the photo gallery application is installed, plug your camera into your computer to transfer your photos. You should see the following window pop up.
Select Import Pictures and Videos using Windows Live Photo Gallery.
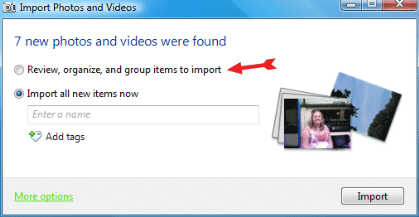
The next screen will allows you to name and tag the photos you are importing. It is important to add this information to your photos so you organize and find them later. If you've taken photos over series of days on different subjects, you'll want to choose the first option. Otherwise, the second option is best when all the photos on your camera are similar.
Since my subjects are different, choose the first option.
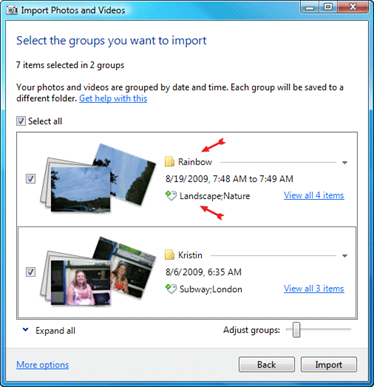
For each group of photos, type a name and some tags. The name is similar to an album name and this is where all the photos will be stored on your computer. The tags help describe what is in the photo. Example tags: Dog; Cat; Pet; Nature; Landscape; Vacation; Flower; Food
Click import to load the photos onto your computer.
Step 2: Fix and Rate Photos
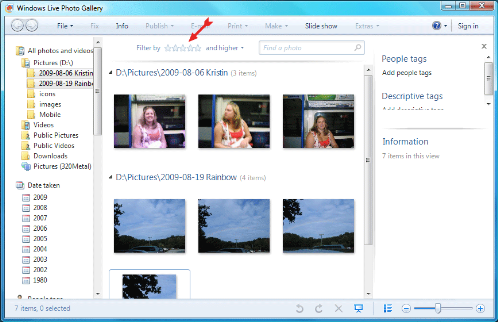
Now you should see photos inside Windows Live Photo Gallery. Go through your photos and Fix them by cropping or adjusting the exposure and colors. Each time you look at a photo, you should add any additional tags or even a caption to the photo. Now you can rate your photos. Here is how I rate my photos.
| Rating | Description |
|---|---|
| No Stars | Don't even rate photos that are below average |
| * Stars | This is an ok photo, but not good enough to show off |
| ** Stars | This is a good photo with substantial meaning, personal album |
| *** Stars | This is a great photo people should see, share online album |
| **** Stars | This is a best in class photo, wall hanger |
| ***** Stars | This is an extremely rare excellent photo, magazine cover |
Step 3: Publish Photos Online
Now that your photos are well tagged, you can publish them online to share with everyone. I use Picasa, but you can also use Flickr, Facebook, Smugmug, and others. You'll likely need a plugin to publish to these online services. See Listing of Publish Plugins for Windows Live Photo Gallery.
Since I am using Picasa, I'm going to download the Picasa plugin. Once it is installed, you are now ready to upload your photos.
Next, select all the photos you want to upload to a single album. You can choose your best photos by filtering them with the stars.
Once you've selected the photos you want to upload, click Publish and choose Publish on Picasa Web Albums.
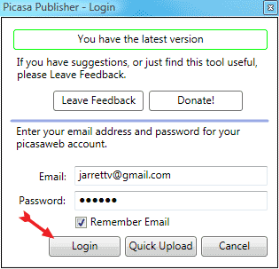
Login with your Google account.
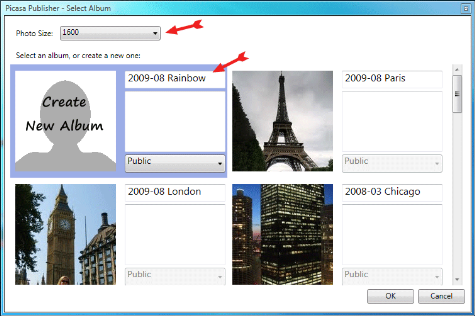
Now you can choose an existing album or create a new album. Type in a name and optional description. Also, I recommend that you limit the max photo size to 1600 or lower to speed up the uploads (and keep people from stealing full resolution copies of your photos).
Click OK to start uploading.
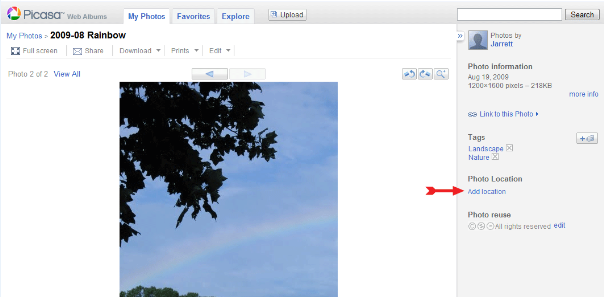
Once your photos are uploaded, you can view them online.
Step 4: Set Location of Photos
Choose a photo from your new album. Click the Add Location link on the right side of the photo.
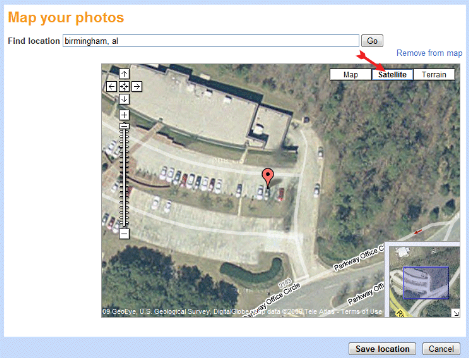
Type in the location of where you took the photo. Zoom in on the map and click the exact location to mark where you took the photo. It is very helpful to switch to satellite mode. Usually, in satellite mode, you can zoom in for an extremely accurate geotag.
Now you can add the location to the rest of your photos in the album.
Tip: It is best to do this photo-by-photo in succession since the locations are usually near each other on the map.
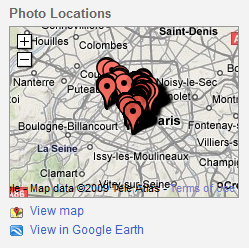
Once you've marked all the locations of your photos, you can see where they were taken on the album map.
Congratulations, now you can email the link to your new online photo album and wow your family and friends.
Comments
None.