Jarrett's Tech Blog
-
Getting Started with Android
I've been following Android since it was released in late 2008. I was excited because I knew the potential was limitless. One year later, both me and my wife got our first Android phones, the Verizon Motorola Droid. It only took a year for Android to mature into greatness, but it still has a way to go. I'll discuss some of the basics of using Android and share some of my favorite tips and applications.
Why I Like Android

Android is built on top of a solid foundation of openness and optimism. Computer geeks like me love the piece of mind that comes with knowing you can change/fix anything you don't like about your phone. Android allows you customize anything about the phone. Also, Google is pushing for an ecosystem where all devices are treated equal. The future of the cell phone is not 2 year contracts or nickle and dime calling plans. We will no longer need voice plans, just a monthly data plan. Android will enable this. If not 2010, 2011.
Before You Start
With Android, your data lives in the cloud. For the best experience, before you get your new Android phone, you should update your contacts on your Gmail account. Still using Hotmail? Now is a good time to switch.
The contacts manager in Gmail works really well. It isn't pretty and there does seem to be some missing features, but it gets the job done.
- Organize your contacts into Groups
- Clean up your contacts, put the proper first and last name in for everyone
- Add phone numbers, addresses to your contacts so you can easily call or navigate to the contact
- You can batch import from a CSV file
- Add pictures to your contacts so they show on the phone (Note: your phone will pull a picture from Facebook but the picture is usually too small to see clearly)
- Crop pictures of contacts to just their face so it is easier to recognize when they are small
Things to Know About your Droid
The Droid is a great phone, but there are few things you should know about it.
- There is a button on the top to turn the screen on and off (I didn't know at first because my wife turned it on for the first time).
- The screen and OS support multi-touch but it is not enabled. When I first held the phone, my finger would inadvertently touch the side of the screen and my other finger would not register swipes and taps. So make sure when you hold the phone, your fingers aren't touching the side of the screen.
- The gold button on the side is the camera button. Just hold it down to start the camera. Hold it down again to focus and take a picture.
- Before taking pictures, wipe the lens with a clean cloth as my lens is usually smudged from handling it.
- There is protective plastic behind the sliding screen. It will come off eventually. No big deal.
Things to Know About the Android OS
- The notifications take place at the top the screen. You can drag this down to see more info about the notification or clear the notifications.
- Hold down the home button to switch between recent applications.
- Hold down the search button to do voice searches.
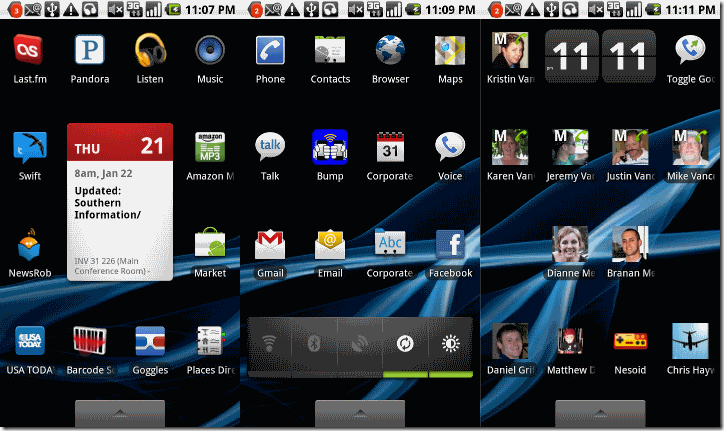
- Touch and hold down anywhere there is a blank spot on the desktop to add shortcuts and widgets to the desktop. You can swipe between three desktops. Take advantage of all three.
- Make sure you use the toggle widget to manage your battery usage.
- The icons from left to right are: Wifi, Bluetooth, GPS, Sync, Brightness
- Airplane mode will use the least amount of battery.
My Desktops
- The middle screen is where I keep the main apps that I use on a daily basis. This is also where I have the Power Control widget that is very important for controlling battery usage.
- The right screen is where I keep shortcuts for directly calling people, mostly my family.
- The left screen is where I access my music and news and check my calendar.
Accessories
I received a multi-media dock as a present and I keep it at my desk at work. I love it. The phone easily slides in and out and it keeps my phone charged. My wife has the car dock and she loves it as well.
If you have the docks then you can't really use protective cases. All the protective cases for the the Droid seem crappy anyway probably because it is physically difficult to make a decent case for a slider phone. Anyway, the screen is Gorilla glass which makes it very difficult to scratch.
Applications
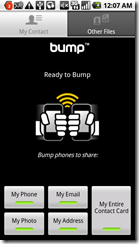
- Bump - this application is great for exchanging photos and contact information. You can even bump iPhones.
- Barcode scanner, Google Goggles - take pictures of barcode and QR codes or with goggles you can take pictures of stuff and it will figure out what it is. You can even download new applications to your phone by taking a picture of the 2D barcode.
- Google Voice - replaces my old cell-phone number and gives me Gmail like functionality for my voice mail. When anybody calls my Google Voice number, it rings my cell, both my work numbers, and it rings on my computer at home.
- Corporate Email - Android has decent support for corporate email with exchange access. It isn't the complete exchange experience, but it works.
- FlingTap Done - A nice TODO list app that has some neat features.
- Google Maps w/ Google Latitude - the maps application is great. It supports street view, and with latitude, you can see where your friends are at. Now, when my wife meets me at the restaurant, I know when she'll arrive.
- Tracks - record the GPS locations of your jogs, walks, car rides, etc.
- Music - with all the internet based music apps, you don't really need to put music on your phone. I like Last.fm and Slacker radio. Pandora is starting to have too many comercials. Also, you can easily buy songs from Amazon MP3 or just listen to 30 seconds of all the "Hot" songs.
- Podcasts - I use Google Listen for my podcast needs. Ironically, the search function isn't that great.
- Newsrob - Although I prefer to use Google Reader on my laptop to keep up with my favorite blogs, this app does the job when I'm on the go and it stays in sync with Google Reader.
- USA Today and NPR News - good news apps.
- Google Talk, Facebook, Swift - these apps let me IM, keep in touch with friends and tweet.
- OpenSudoku, Shortyz (cross word), Robot Defense (tower defense), Devilry Huntress (bejeweled), Labyrinth Lite, Totemo are all fun puzzle/strategy games.
- Nesoid and SNesoid are great emulators for some retro Nintendo and Super Nintendo gaming.
- SchottGunn and The Schwartz Unleashed turn your phone into a light saber and a shotgun.
- Flixster Movies - goto app for when we feel like going to the movies.
-
Comparison of YUI Compressor for .Net to Microsoft Ajax Minifier
Microsoft just released the Microsoft Ajax Minifier for minifying javascript files. Since I've been using the Yahoo! UI Library: YUI Compressor for .Net to do this in AtomSite, I thought it would be great to compare the two to see which is best. I'm mainly interested in the file size reduction but it would be nice to know any speed differences as well.
The Test
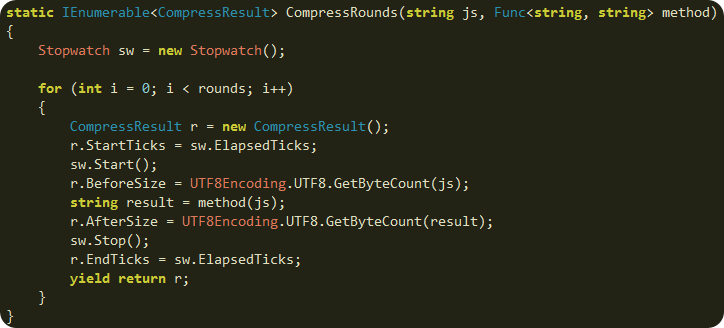
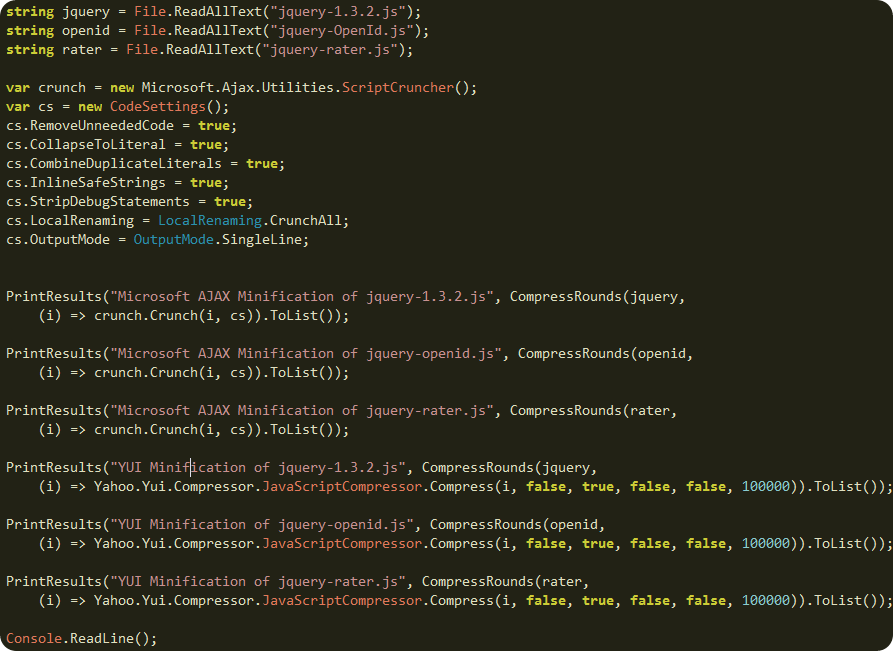
This method allows me to test compress some javascript using any method I pass into the Func delegate and capture the results.
To get a reasonable sample of the performance I minified 3 different files with each method 1000 times. I attempted to configure both algorithms to produce the smallest output possible.
The Results
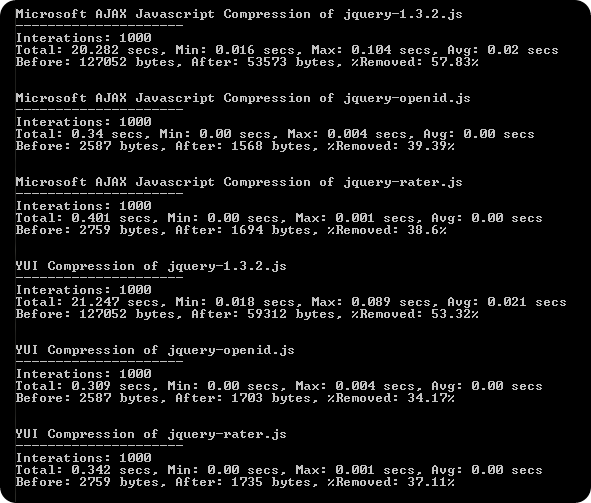
From these results you can see that Microsoft AJAX Minifier creates smaller files in about the same amount of time. Note, both algorithms have been set in aggressive, or hypercrush, mode to rename variables and perform other tweaks for reducing file size. The Microsoft AJAX Minifier seemed to have more granular options for tweaking output. However, the YUI Compressor is open source so you could add additional options if you need them.
The Comparison
Scorecard Speed Size Reduction Options CSS & JS Support Build Task Open Source YUI Compressor 


Microsoft AJAX Minifier 


And the Winner is..
It depends. I suggest using the Microsoft AJAX Minifier as it produces smaller files. However, the YUI Compressor.Net better satisfies my needs as it can minify both JS and CSS files. So, when I need to minify dynamic combinations of both types of files, I'll use Yahoo! UI Library: Compressor for .Net. When I need to do one-time minification during a build or prior to deployment, I'll use the Microsoft AJAX Minifier.
Download
I've uploaded the test solution and console app so you can run the tests yourself.
JsMinTest.zip (291KB) fixed
More Reads
- Ajaxian reviews output differences: Microsoft Ajax Minifier VS YUI Compressor
- YUI Compressor home page
- Scott Gu's Announcement: Announcing Microsoft Ajax Library (Preview 6) and the Microsoft Ajax Minifier
- Stephen Walther: Using the New Microsoft Ajax Minifier
Check out how I am using minification and combination in AtomSite to speed up page load time.
-
Publish Photos with Live Photo Gallery to Picasa Online
The following guide will assist you in posting your favorite photos online for you friends and family to enjoy. It will also show you how to geotag those photos as to see where the photo was taken on the map.
Step 1: Import Photos from Camera
You should already have Windows Live Photo Gallery installed on your machine. If not, you can download it from Microsoft.
Tip: when downloading, uncheck the MSN Toolbar and anything else you don't need from the install.
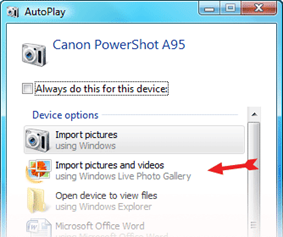
Once the photo gallery application is installed, plug your camera into your computer to transfer your photos. You should see the following window pop up.
Select Import Pictures and Videos using Windows Live Photo Gallery.
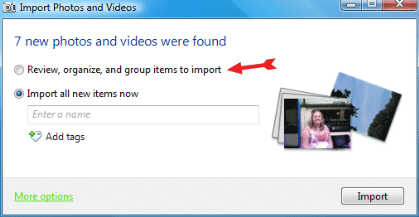
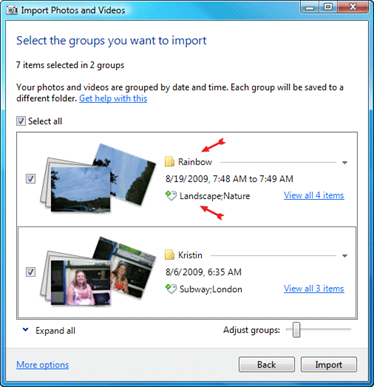
The next screen will allows you to name and tag the photos you are importing. It is important to add this information to your photos so you organize and find them later. If you've taken photos over series of days on different subjects, you'll want to choose the first option. Otherwise, the second option is best when all the photos on your camera are similar.
Since my subjects are different, choose the first option.
For each group of photos, type a name and some tags. The name is similar to an album name and this is where all the photos will be stored on your computer. The tags help describe what is in the photo. Example tags: Dog; Cat; Pet; Nature; Landscape; Vacation; Flower; Food
Click import to load the photos onto your computer.
Step 2: Fix and Rate Photos
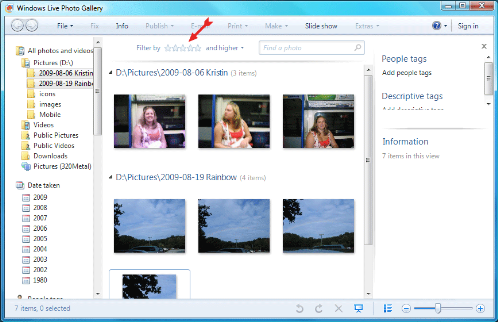
Now you should see photos inside Windows Live Photo Gallery. Go through your photos and Fix them by cropping or adjusting the exposure and colors. Each time you look at a photo, you should add any additional tags or even a caption to the photo. Now you can rate your photos. Here is how I rate my photos.
Rating Description No Stars Don't even rate photos that are below average * Stars This is an ok photo, but not good enough to show off ** Stars This is a good photo with substantial meaning, personal album *** Stars This is a great photo people should see, share online album **** Stars This is a best in class photo, wall hanger ***** Stars This is an extremely rare excellent photo, magazine cover Step 3: Publish Photos Online
Now that your photos are well tagged, you can publish them online to share with everyone. I use Picasa, but you can also use Flickr, Facebook, Smugmug, and others. You'll likely need a plugin to publish to these online services. See Listing of Publish Plugins for Windows Live Photo Gallery.
Since I am using Picasa, I'm going to download the Picasa plugin. Once it is installed, you are now ready to upload your photos.
Next, select all the photos you want to upload to a single album. You can choose your best photos by filtering them with the stars.
Once you've selected the photos you want to upload, click Publish and choose Publish on Picasa Web Albums.
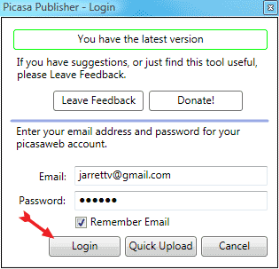
Login with your Google account.
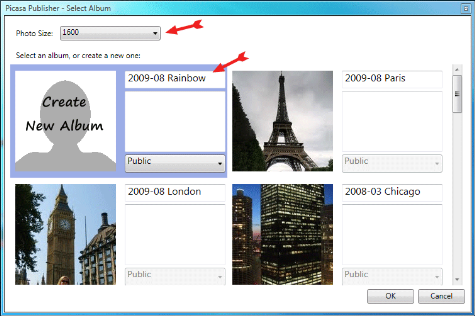
Now you can choose an existing album or create a new album. Type in a name and optional description. Also, I recommend that you limit the max photo size to 1600 or lower to speed up the uploads (and keep people from stealing full resolution copies of your photos).
Click OK to start uploading.
Once your photos are uploaded, you can view them online.
Step 4: Set Location of Photos
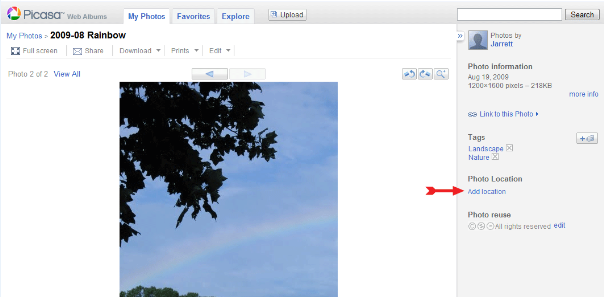
Choose a photo from your new album. Click the Add Location link on the right side of the photo.
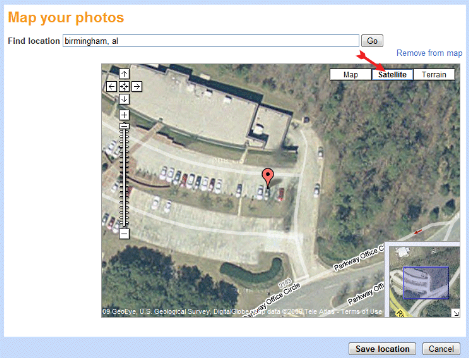
Type in the location of where you took the photo. Zoom in on the map and click the exact location to mark where you took the photo. It is very helpful to switch to satellite mode. Usually, in satellite mode, you can zoom in for an extremely accurate geotag.
Now you can add the location to the rest of your photos in the album.
Tip: It is best to do this photo-by-photo in succession since the locations are usually near each other on the map.
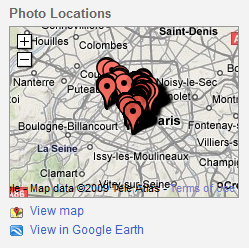
Once you've marked all the locations of your photos, you can see where they were taken on the album map.
Congratulations, now you can email the link to your new online photo album and wow your family and friends.
-
Get Value of Checkbox using jQuery to Enable Button
Reading the value of a checkbox in jQuery is not obvious. You must use a special selector :checked and then check if the value is undefined.
//checked
var checked = $('input[type=checkbox]:checked').val() != undefined;

//unchecked
var unchecked = $('input[type=checkbox]:checked').val() == undefined;
The typical use case for this code is when you want the user to check the "I agree to the terms and conditions" before they can continue. For example:
$(function() {
  $('#agree').click(function() {
    var satisfied = $('#agree:checked').val();
    if (satisfied != undefined) $('#continue').removeAttr('disabled');
    else $('#continue').attr('disabled', 'disabled');
  });
});
The above code finds the checkbox and binds to the click event. When the user checks or un-checks the checkbox, it finds the continue button and enables or disables it based on the value of the checkbox.
Update - A more elegant way
//checked
var checked = $('input[type=checkbox]').is(':checked');
Change Textbox Readonly Value via Checkbox using jQuery
Another case you may want to enable or disable a textbox based on the value of the checkbox.
$(function() {
  $('#isOther').click(function() {
    var other = $('#isOther:checked').val();
    if (other != undefined) $('#other').removeAttr('readonly');
    else $('#other').attr('readonly', 'readonly');
  });
});
The above code changes the readonly property on the textbox when the checkbox is changed by the user.
-
Tiny HTPC Movie and Hulu Box Part 5 Conclusion
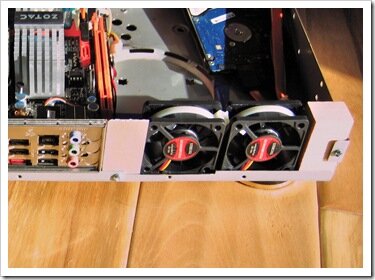
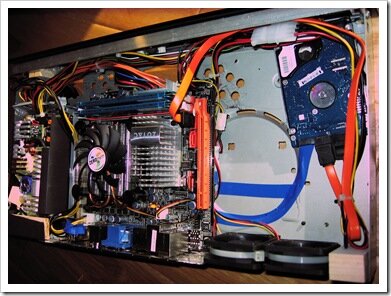
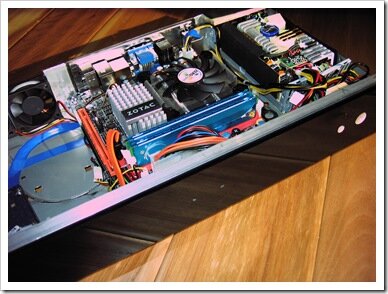
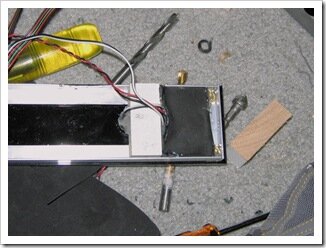
The two 50mm fans arrived and I put them into their new home. To line them up in the back, I raised them up on a small piece of wood and tie-wrapped them into place. They are the perfect height for the case. I used some aluminum to fill in the blank spaces. I got lazy at the end and used a wood block to plug the last space.
The HTPC made too much noise with these new fans so I made a couple modifications:
- Change fans to run from 5 volt instead of 12 volt (from 5000rpm down to 2100rpm) see here
- Remove some of the metal blocking the PSU fan
The noise is now on par with the original Xbox. I plan to replace the PSU fan with a silent 40mm fan from FrozenCPU to further reduce the noise.
I also removed the casing over the PSU and organized the wires for better air flow. I taped over some of the rear holes so the air would enter from the front and travel across the motherboard.
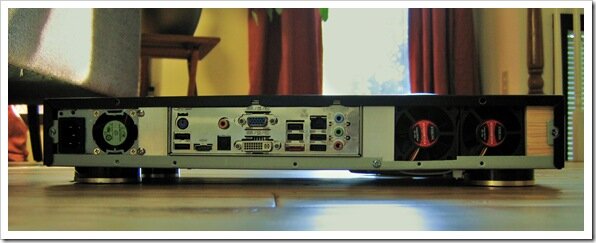
Temps CPU 1 CPU 2 Northbridge Idle 32 C 33 C 48 C Load 58 C 60 C 55 C The Rear
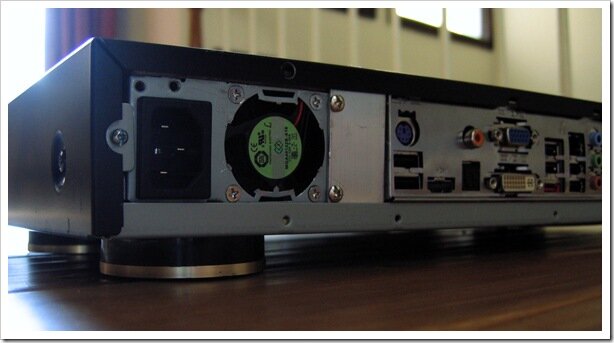
The motherboard IO panel fit perfectly between the top and bottom of the case.
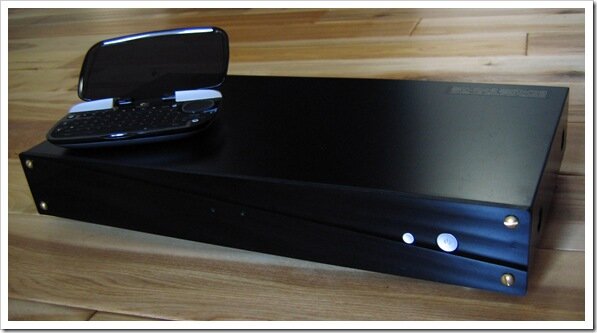
The Front
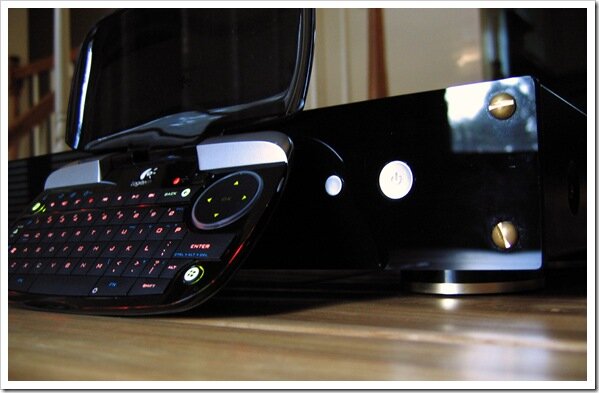
I lightly sanded the sharp edges of the black plexi-glass. I did not have any extra fine sandpaper so I used a buffing pad to get a smooth matte match with the case.
The keyboard is a Logitech diNovo Mini and compliments the case really well. The Zotac ITX motherboard allows you to enter the BIOS using the Delete key. So even though the keyboard doesn't have function keys, it will still work in the BIOS.
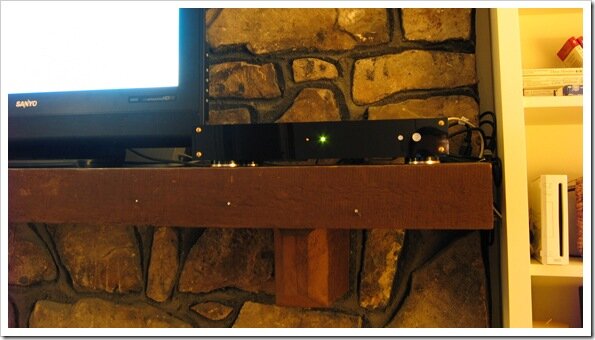
Here it is in it's final resting place on the fireplace mantel. You can see the Wii on the right for comparison.
I'm very happy with how the custom modded case turned out. The motherboard, PSU, fans, buttons, and black plexiglass all came together much better than I expected. It is a cool, quiet, and beautiful computer. Most of all, it plays every file format and can run video from any website perfectly.
I recently installed Boxee and I've been watching some 1080p files and listening to Pandora all within the same interface. Boxee is definitely the future of the HTPC.
-
Tiny HTPC Movie and Hulu Box Part 4 Assembly
I created the front from a scrap piece of black plexi-glass found at a local glass supplier: Eastern Shore Glass. They cut it for me by scoring and snapping it. They were extremely nice and helpful. I got two pre-cut pieces and some scrap all for $8.
I drilled holes in the plexiglass for the buttons and LEDs.
Drilling a hole in plexiglass greater than 1/4" is tricky. I needed to start with a smaller bit and keep increasing the size to keep shards from breaking off.
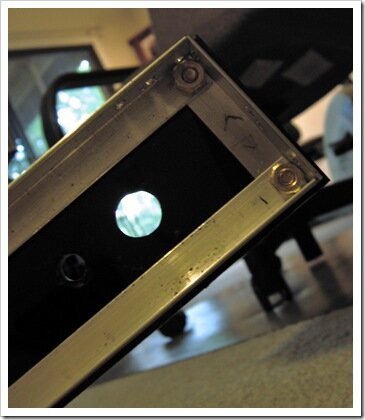
On the back side of the black plexiglass I created a frame from aluminum that I could use to mount it to the case. I used brass screws to match the case feet.
Working with aluminum is fun as it is a fairly soft metal that is easy to drill and cut.
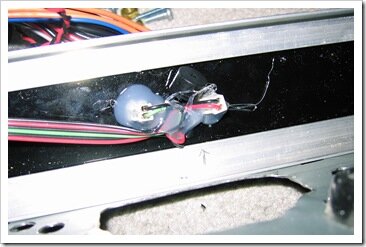
The buttons are held in place with wood and hot glue. The LEDs are simply hot glued in place.
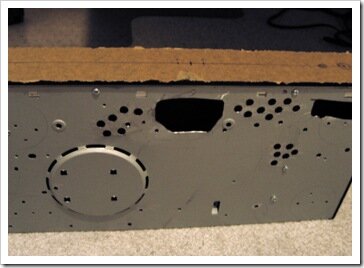
I bolted the plexiglass aluminum frame to the case. On the bottom of the case, I drilled and cut holes for air intake. The cool air enters from below and travels across the motherboard to exit out the rear via fans. There are no vents on the top or sides.
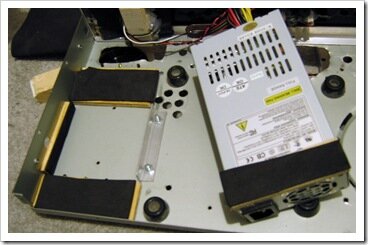
I mounted the power supply in the case using a single bolt which keeps it from sliding backward when plugging in. I used wood spacers covered with a thin layer of foam to allow the PSU to be sandwiched between the top and bottom of the case. A small bracket made from aluminum provides enough friction to keep the PSU firmly in place.
Update: I've since removed the power supply circuit board from the casing and created a new solid backplate so I could reduce the number of fans needed in the case. I also added additional holes below the PSU circuit board to bring in cool air.
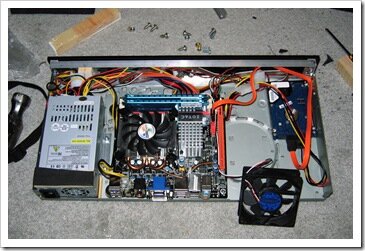
I mounted the motherboard by drilling four holes and using small bolts. The rubber feet act as standoffs to raise the motherboard up to the desired height. It also allows air to easily travel below and around the board.
In the next part, I'll mount the fans, round the edges of the plexiglass and show the final photos of it in action.
-
Jackson
-
Tiny HTPC Movie and Hulu Box Part 3 Hardware Test
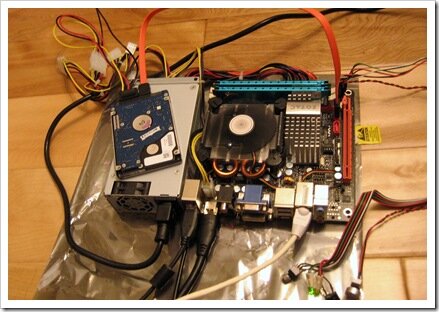
The parts arrived from Newegg and I put it together. The Intel fan that came with the CPU was not very tall. The fan may have fit the short height of the case, but it would have been tight. I'm glad I ordered the other fan.
Here is a picture of it after I turned it on.
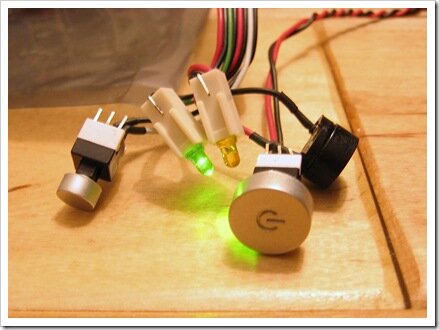
I rescued some buttons, LEDs, and speaker off of an old case.
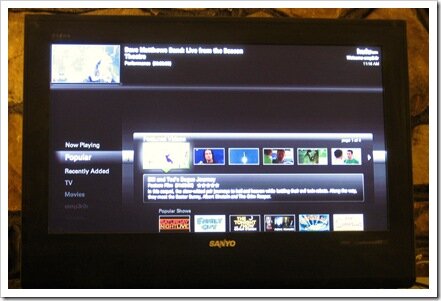
I fired it up, loaded Windows 7 RC1 and the new Hulu Desktop app.
Unfortunately, watching fullscreen Hulu is choppy. I've played many different video formats (MKV, Bluray, DivX) and they all play smooth regardless of resolution (720p, 1080p, etc). This is definitely a bug in the Hulu desktop app as even CBS, Youtube, and Vimeo HD videos playback fine. I plan to try some various changes to resolve the Hulu video stuttering.
Update: Hulu is only choppy within the desktop application. It is smooth when played through the browser.
Update2: Found a thread in their forum: Lag in fullscreen mode
It is also mentioned in many other threads so this seems to be a common problem. Let's hope they fix it soon.
In the next part, I'll mount the parts into their tiny new home (see part 1) and fabricate a front-panel.
-
Unzip Nested Zip Files While Streaming
I recently encountered a scenario where I needed to unzip all the files in a zip file and also any files from internal zip files. The source data is streaming in through an HTTP POST via IIS into BizTalk. The zip files can be large (up to 200 MB) and there can be multiple posts happening at the same time. This is too much data to fit in memory. Also, I needed to avoid unnecessary network traffic so using temporary files is not an optimal solution. Therefore, I needed a forward-only streaming solution.
To accomplish this, I turned to #ziplib. The ZipInputStream object looked like the perfect solution to this situation. Here is an example of how to use this class:
using ( ZipInputStream s = new ZipInputStream(stream)) {
  ZipEntry theEntry;
  while ((theEntry = s.GetNextEntry()) != null) {
    int size = 2048;
    byte[] data = new byte[2048];
    size = s.Read(data, 0, data.Length);
    if (size > 0) {
      Console.Write(new ASCIIEncoding().GetString(data, 0, size));
    } else {
      break;
    }
  }
}
As the raw data is streamed through the ZipInputStream, it gets unzipped. The GetNextEntry() method sets the position to the beginning of the next file. Then we just read from the ZipInputStream to get the unzipped file data. So to unzip nested zip files, I came up with a function I could call recursively:
public static void NestedUnzip(Stream stream, string targetPath)
{
  ZipInputStream s = new ZipInputStream(stream);
  ZipEntry entry;
  while ((entry = s.GetNextEntry()) != null) {
    //when internal zip file, unzip it
    if (Path.GetExtension(entry.Name).ToLower() == ".zip") {
      NestedUnzip(s,
        Path.Combine(targetPath, Path.GetFileNameWithoutExtension(entry.Name)));
    } else {
      //make sure target path exists
      string path = Path.Combine(targetPath, entry.Name);
      Directory.CreateDirectory(Path.GetDirectoryName(path));

      //write the data to disk
      using (FileStream fs = File.Create(path)) {
        byte[] buffer = new byte[1024];
        int read = buffer.Length;
        while (true) {
          read = s.Read(buffer, 0, buffer.Length);
          if (read > 0) fs.Write(buffer, 0, read);
          else break;
        }
      }
    }
  }
}
Now this would work great for my needs as it process the data as a forward-only read-only stream. However, whenever a nested zip runs out of entries (i.e. GetNextEntry() == null) the ZipInputStream calls close on the underlying stream. This results in the unzip process ending prematurely.
To fix this, I commented out the Close() call within the GetNextEntry() method of the ZipInputStream class:
if (header == ZipConstants.CentralHeaderSignature ||
  header == ZipConstants.EndOfCentralDirectorySignature ||
  header == ZipConstants.CentralHeaderDigitalSignature ||
  header == ZipConstants.ArchiveExtraDataSignature ||
  header == ZipConstants.Zip64CentralFileHeaderSignature) {
  // No more individual entries exist
  // -jv- 11-Jun-2009 Removed close so it can support nested zips
  //Close();
  return null;
}
Of course, the calling method should properly close the source stream so this is a safe change to make. For example:
using (Stream s = inmsg.BodyPart.GetOriginalDataStream()) {
  NestedUnzip(s, unzipLocation)
}
The result is a perfect streaming solution with low memory usage and no need for temporary files.
-
Tiny HTPC Movie and Hulu Box Part 2 The Parts
I ordered the parts today from Newegg.
- Power Supply
FSP Group FSP180-50PLA 180W Single Server Power Supply - OEM - CPU Fan
ZEROtherm ATOM 30H Low-Profile cooler for ITX, MATX, HTPC-Retail - Retail - Motherboard
ZOTAC GF9300-D-E LGA 775 NVIDIA GeForce 9300 HDMI WiFi Mini ITX Intel Motherboard - Retail - CPU
Intel Pentium E6300 Wolfdale 2.8GHz LGA 775 65W Dual-Core Processor Model BX80571E6300 - Retail - Memory
G.SKILL 4GB (2 x 2GB) 240-Pin DDR2 SDRAM DDR2 1066 (PC2 8500) Dual Channel Kit Desktop Memory Model F2-8500CL5D-4GBPK - Retail
The video is built into the motherboard and I plan to reuse a hard drive I already have. I'm hoping to get away with just using a Media Center remote control or a smaller bluetooth keyboard once things are setup. Also, I will leave open the option of adding a full-size DVD/Bluray drive in the future.
These parts are powerful enough to do everything I need.
In the next part, I'll assemble the parts and load the OS to test out the components.
